meta data for this page
How to Prepare and Export a Clean Object Sharing Setup in uiTLM
Learn how to build a lightweight, conflict-free “clean slate” configuration for object sharing and distribution. This guide details the essential architecture and cleanup protocols for purging hidden application metadata, defined styles, and unused resources before file export.

===== Introduction to the “Clean Slate” Setup ====-
Creating an “Object Sharing” setup requires more than simply clearing the visible screen. Similar to deleting a desktop shortcut while leaving the source file intact, merely removing icons leaves metadata, defined styles, and unused resources in the application's storage. To ensure a lightweight, conflict-free distribution file (best-effort “clean slate”), a thorough “Clean Room Protocol” is required to purge these background remnants.
Disclaimer & Usage Warning
This procedure guides the creation of the “Clean Slate Default” shell and provides background on the architecture. Note: Device configurations may vary; review the process carefully before proceeding.
Skip the work: The finished product and the procedure for using the shell is found at:
How To: Share an Object With Other TL Users
Pre-start: Create a Safety Backup
Before initiating the purge, create a backup of the current configuration to prevent accidental data loss.
- Enter Edit mode (long-press empty area or use pinch-in gesture).
- Go to Launcher options > Backup center.
- Select the Add icon
 to initiate a new backup.
 - Select
New backup. - The Title dialog defaults to
backup_yyyymmdd. Change this toSafety_Pre_Wipe_yyyymmdd. - Select OK to save.
- Verification: Confirm the new file appears at the top of the backup list before proceeding.
- Optional but recommended:
- Export the safety backup:
- Tap the 3-dot menu to the right of the
Safety_Pre_Wipe…backup. - Select
Export backup. - Navigate to a secure storage location (SD Card or Cloud) and save.
- Reasoning: This ensures that even if you accidentally delete files in the following steps, your original setup is safe outside the app.
Prepare the Clean Slate Shell
To achieve a true zero-state, the cleaning process must address both visible elements and internal definitions.
Phase 1: The Visual Purge (The Easy Part)
This phase focuses on removing active elements from the workspace and resetting core resource pointers to their lightest defaults.
- Clear Screen Objects:
- Navigate to the “Home” page.
- Long-press any object (icon, widget, or graphic) to select it.
- In the Object Design menu (top), tap the
Deleteicon .
. - Repeat this process until the page is completely empty.
- Hidden Objects Check: Check for invisible elements (like transparent spacers) by tapping empty areas in Edit mode.
- Batch Delete: To verify the page is empty and clear everything at once:
- Tap the Select icon
 in the top-left corner.
 - Drag a selection box from the upper-right to the lower-left corner.
- If any objects are caught, tap the Delete icon.
- Purge Resource Containers (Pages):
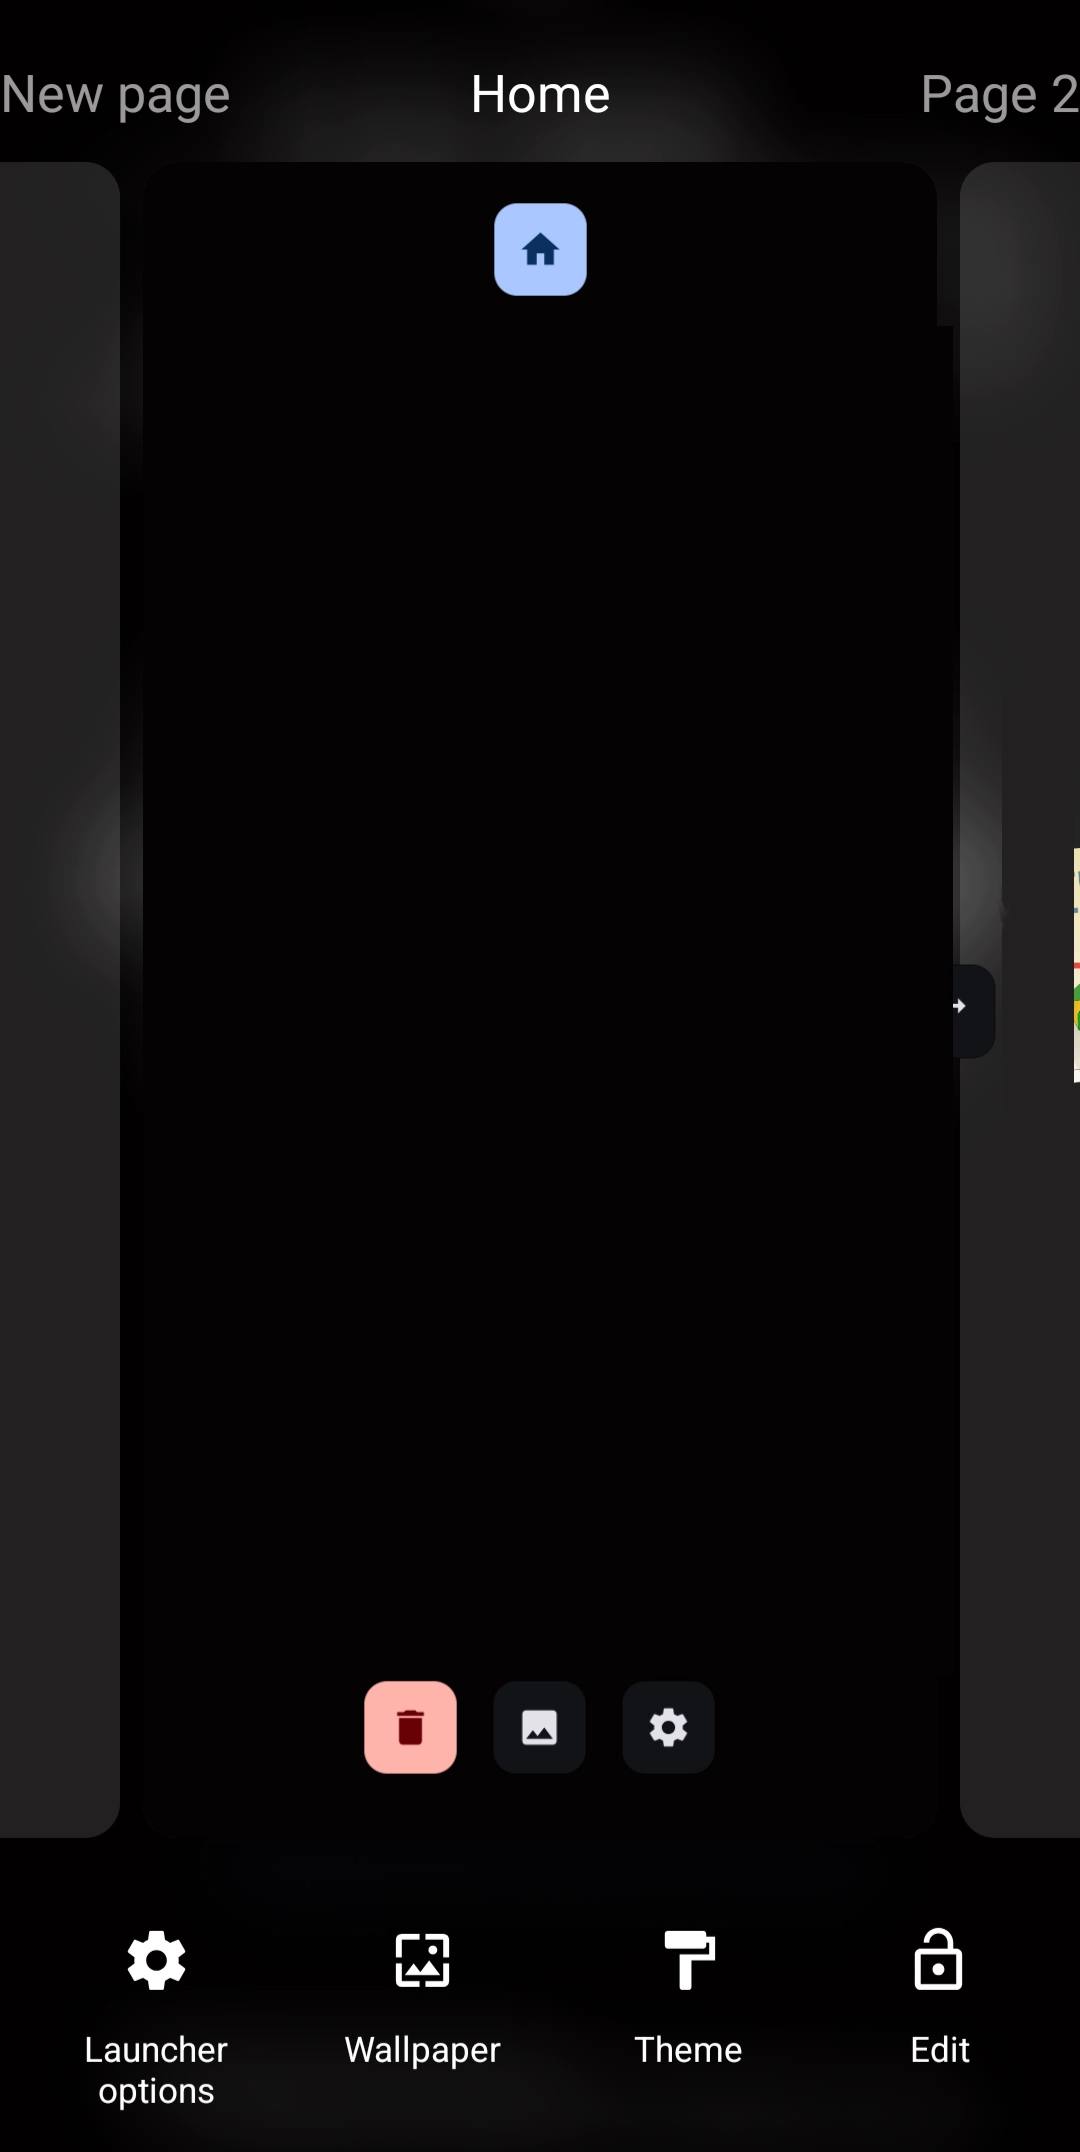
- Open the Page Manager using the pinch-in gesture to view the setup's Edit On mode .
- Tap the
Editicon .
. - Horizontally scroll through the pages.
- Delete all pages, except the one designated as “Home”.
- Tap the
Deleteicon and confirm. - A single-page setup is now shown.
- Tap the Option icon
 on the remaining page.
- Set Label to
Home. Tap OK.



Phase 2: The "Warehouse" Purge (The Invisible Data)
This is where actual personal data hides. Total Launcher keeps a library of every image or icon ever imported, even if it was deleted from the screen.
- Enter
Edit Modeand tap theLauncher optionstab .
. - Select
Resources.- For each of the resource areas shown (•Shape, •Image, •Dynamic image, •Shadow, •Typeface, •Sound, •Window, •Sequence):
- Tap the category to review the list.
- Tap and hold a single object to enter selection mode.
- Tap the “Select All” icon (✔✔) in the top-right corner.
- Tap the Delete icon
 in the bottom-right.
- This can be later verified by using a file manager (such as miXplorer) to inspect the system folders as follows:
- Backup: /Internal_storage/Android/data/com.ss.launcher2/files/backups
- Dynamic Images: /Internal_storage/Android/data/com.ss.launcher2/files/backups/.NameOfBackupFile/dynamicimages
- Fonts: /Internal_storage/Android/data/com.ss.launcher2/files/backups/.NameOfBackupFile/fonts
- Images: /Internal_storage/Android/data/com.ss.launcher2/files/backups/.NameOfBackupFile/images
- Sequences: /Internal_storage/Android/data/com.ss.launcher2/files/backups/.NameOfBackupFile/sequences
- Shadows: /Internal_storage/Android/data/com.ss.launcher2/files/backups/.NameOfBackupFile/shadows
- Shapes: /Internal_storage/Android/data/com.ss.launcher2/files/backups/.NameOfBackupFile/shapes
- Sounds: /Internal_storage/Android/data/com.ss.launcher2/files/backups/.NameOfBackupFile/ sounds
- Windows: /Internal_storage/Android/data/com.ss.launcher2/files/backups/.NameOfBackupFile/wnds
- Total Launcher will strictly prevent the deletion of system defaults (built-in assets) or resources currently in use by the active Home page. If it refuses to delete an item, it is likely a required dependency—leave it.
- Repeat for all remaining categories.
- Reset Launcher Options: (Resetting to neutral defaults)
- Enter
Edit Mode>Launcher options:- Select
Behavior:- General: Uncheck all boxes.
- App Drawer:
- Sort order: Set to
Name. - Reset icon and label: Tap and confirm (removes custom renaming).
- Badge Count: Turn all switches OFF.
- Advanced:
- Lock level: Set to
Weak. - Password: Clear any text (Ensure it is empty).
- Menu lock: Unchecked.
- GPS interval: Set to
0(or default).
- UI & Animation:
- Wallpaper: Select
No wallpaper. - Animation: Set to
System default. - Status bar & Navigation bar: Uncheck (Hide) for a clean look, or check for the default.
- Page transition:
Sliding. - Sliding Drawer: Uncheck all directions except
On the bottom(this ensures the user can swipe up to see their apps).- If the end-user is not to have access to the sliding drawer, uncheck
On the bottomas in this video. (If on mobile, triple-tap the initial image to view it full screen.)
- Icon style:
- Text color: Set to White (
#FFFFFFFF).
- Key & Gestures:
- Home key: Set to
Select action(or Do Nothing). - Back key: Set to
System default.
- Backup Center:
- Do NOT delete backups here. The export process only captures the *current* layout, not the list of backups stored on the device. Deleting these puts data at risk with no benefit to the shared file.
- Clear App Drawer Metadata:
- Open the App Drawer using a swipe up (or use the assigned gesture).
- Enter
Edit Modeand tap “Edit Off” to turn editing on, or long-press an empty area to toggle the Edit switch. - Select the drawer by tap/hold on the edge boundary of the drawer where the apps are listed. A selection box will appear around the grid of icons.
- Tap the Options icon
 on the top toolbar.
 - Look for “App group”.
- Scenario A: If “App group” is visible, set it to “All apps”.
- Scenario B: If “App group” is MISSING (as is common in some setups), look for the checkbox Group items. Ensure it is Unchecked. This confirms the widget is displaying a flat list of apps, which is the correct default behavior.
- Clean Up Custom Items (Crucial Step):
- Close the options menu and look at the App Drawer grid.
- If any custom folders like “Social”, “Games”, or “Banking” are visible
- Select these custom folders and tap Delete.
- The App Drawer should only display the raw list of apps installed on the device. It should not contain any organized folders, as those are personal preferences that would be saved in the backup.


Phase 3: The "Autopsy" and Export
This step ensures the file is valid and contains no personal data.
- Method A: Standard Export (Try this first)
- Go to
Backup center>Add>New backup. - Name it
Clean_Slate_yyyymmdd. - Tap the 3-dot menu >
Export backup. - Check the file size: If the resulting file is 0 bytes, the export failed (common with empty shells). Proceed to Method B.
- Method B: Manual Export (The Reliable Method for Empty Shells)
- Open the file manager (such as miXplorer).
- Navigate to: `Android/data/com.ss.launcher2/files/backups/`
- Tap to open the folder `.Clean_Slate_…` (do not select the folder itself).
- Select all contents manually by tapping.
- The archive the contents:
- Tap
Menu(3 dots) >Archive. - Configure the Archive Dialog:
- Enter the name: `Clean_Slate_Shell.zip`.
- Format: Ensure
Zipis selected. - Compression: Leave as
Deflate. - Password/Key: Leave
Blank. - Delete source: Ensure this is
Unchecked.
- Tap OK.
- There is now a valid `Clean_Slate_Shell.zip` located inside the backup folder. Move this file to the Downloads folder for easy sharing.
- Inspection (The Autopsy):
- Tap on the new ZIP file to view its contents.
- Open the `images` subfolder.
- This folder should be empty. If filesare here, they are personal images overlooked previously. Go back to Phase 2.
Phase 4: Re-Pack (Optional)
If Method B in Phase 3 was used, the file is already packed and ready. Move it to a public folder (like Downloads) for easy sharing.
Phase 5: Test the "Clean Slate" Shell
Before distributing, verify the shell functions as a neutral base on a device.
- Import the Shell:
- In Total Launcher, go to
Backup center>Import backup. - Select the
Clean_Slate_Shell.zip. - Tap
Restore.
- Evaluate:
- Check that the screen is empty.
- Open the App Drawer to ensure it loads the current device's installed apps (verifying the “All apps” group is active).
- Note: When navigating to
Add>Graphicand viewing the “Saved” tab, the presence of personal icons, photos or objects may appear. Do not worry. This tab is simply a file viewer looking at a specific folder on the current device. It is a local library, not part of the setup.
- Restore The Daily Setup:
- Go to Backup center.
- Locate the
Safety_Pre_Wipe…backup. - Tap
Restore
Comments & Feedback
Toby Lancer is ready to help! Look for the Quick Help form:
► Desktop: left sidebar located near the bottom for Private to Admin
► Mobile: 3-bar menu at page top.
► Use the Discussion section below to share any experiences and communications with other Total Launcher users.
► Any Registered User can directly update this and any wiki page if desired.
Moderation: To keep the manual clean, all comments are held for appropriateness review. Preview any comment before submitting it. It will not be displayed after submission until it is reviewed. So, please, do not resubmit.
Formatting: If using any code snippets, place them inside code tags (e.g., 'code') using double single quotes (') before and after to keep them readable.
Be Kind: This is a community effort. Please keep feedback constructive and on topic.
~~DISCUSSION~~