How To Create 3D Floating Image Frames In Total Launcher
Elevate a home screen design by giving flat photos and icons a premium, three-dimensional presence. Use this guide to build a 'floating frame' (layered shape) effect utilizing Total Launcher’s native graphic shapes. Instead of relying on basic containers, learn how to stack geometric shapes to act as strict vector clipping masks for images. By combining these masked image layers with precisely calibrated, deep Gaussian shadows on the base frame, a striking illusion of depth is created. This walkthrough covers the entire workflow from establishing perfect Z-order alignment to calculating the exact shadow-margin safety buffers needed to prevent visual clipping.
This is the resulting form that the procedure will create: 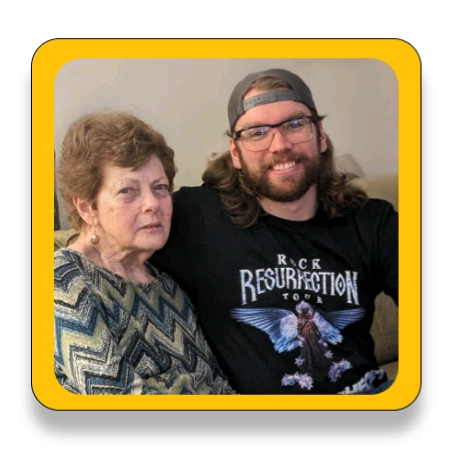
- The Shape Base (Frame)
- This layer acts as the physical frame and casts the deep shadow.
- Create the Object: Long-press an empty spot on your screen and select Add > Graphic > Default > Shape.
- Select Add (+)
- At Type, select round_rectangle
- Change label to
0_rnd_rec_base - In Options (gear), retain the default ‘’28’’ as that is a Material You standard
- In Fill, select Solid which is the default, and for Color1 input
#FFFFD208for a goldish hue. - The dialog is as shown here , then tap OK to place the shape on the page
- Size and Position
- Resize this new shape to the desired overall frame dimensions and place it in the approximate location on the page.
- The Base Shadow
- Create the shadow to be applied to the base.
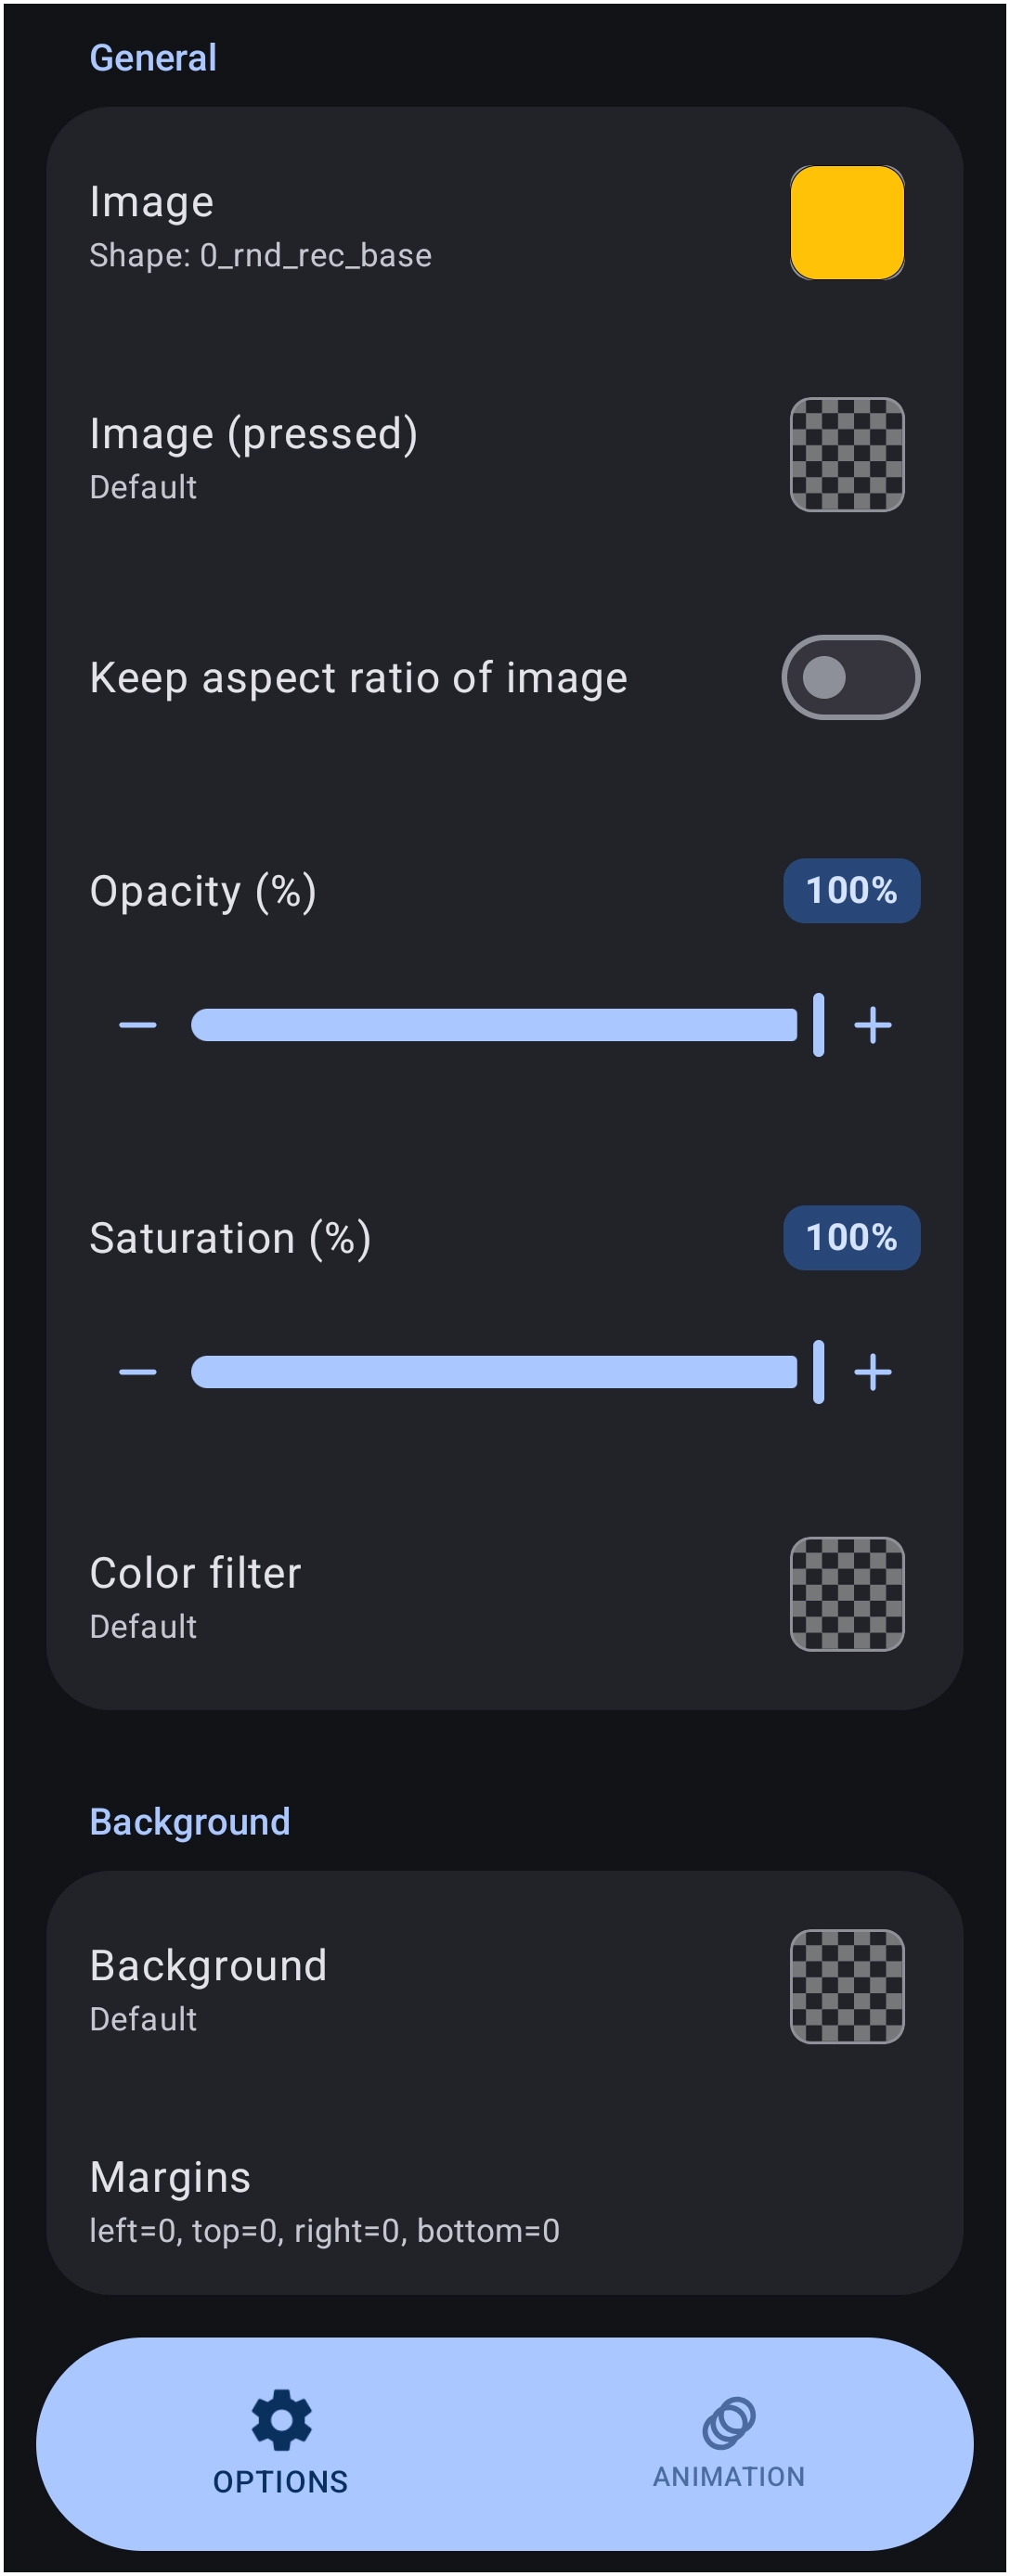
- With the base shape selected, tap Options to open the Object Edit menu.
- The shape (0_rnd_rec_base) is shown as the Image in the dialog.
- Scroll down to tap Background > Shadow
- Tap Add (+)
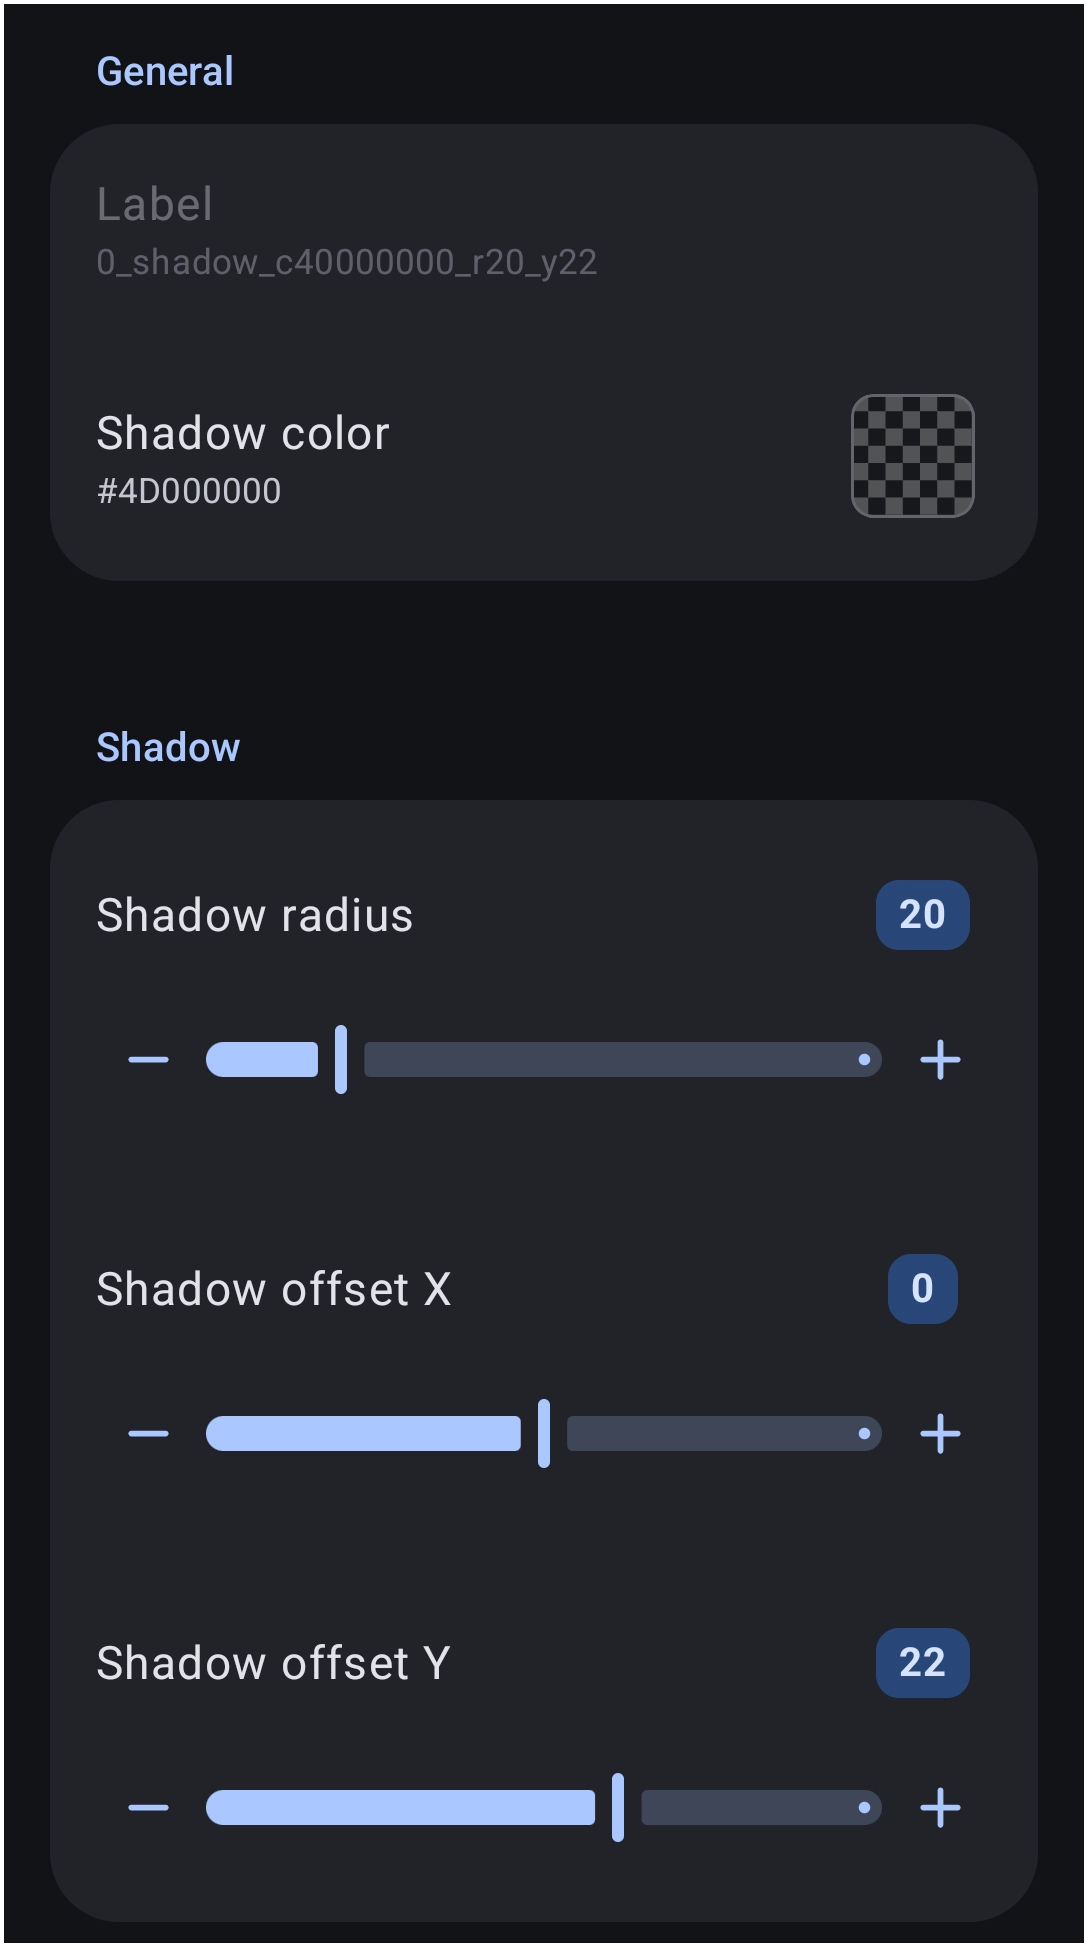
- Tap Shadow color and enter the hex number
4D000000 - For Shadow radius slide to
20(or enter20and tap required OK) - For Shadow offset X leave at default
0 - For Shadow offset Y slide to
22(or enter22and tap the required OK) - Change the label to
0_shadow_c4D000000_r20_y22 - The dialog is as shown here , then tap OK to return to the Shadow list dialog. The required shadow now exists.
- Apply the Shadow to the Base
- Select the Base Shape and tap the Object Design menu Option icon
- Note the image entry reflects the current object
0_rnd_rec_base
- Apply a shadow to the base shape by scrolling down and tapping Shadow > select entry
0_shadow_c4D000000_r20_y22 - Appropriate Margins are required to prevent the shadow from being clipped.
- Scroll down and tap Margins
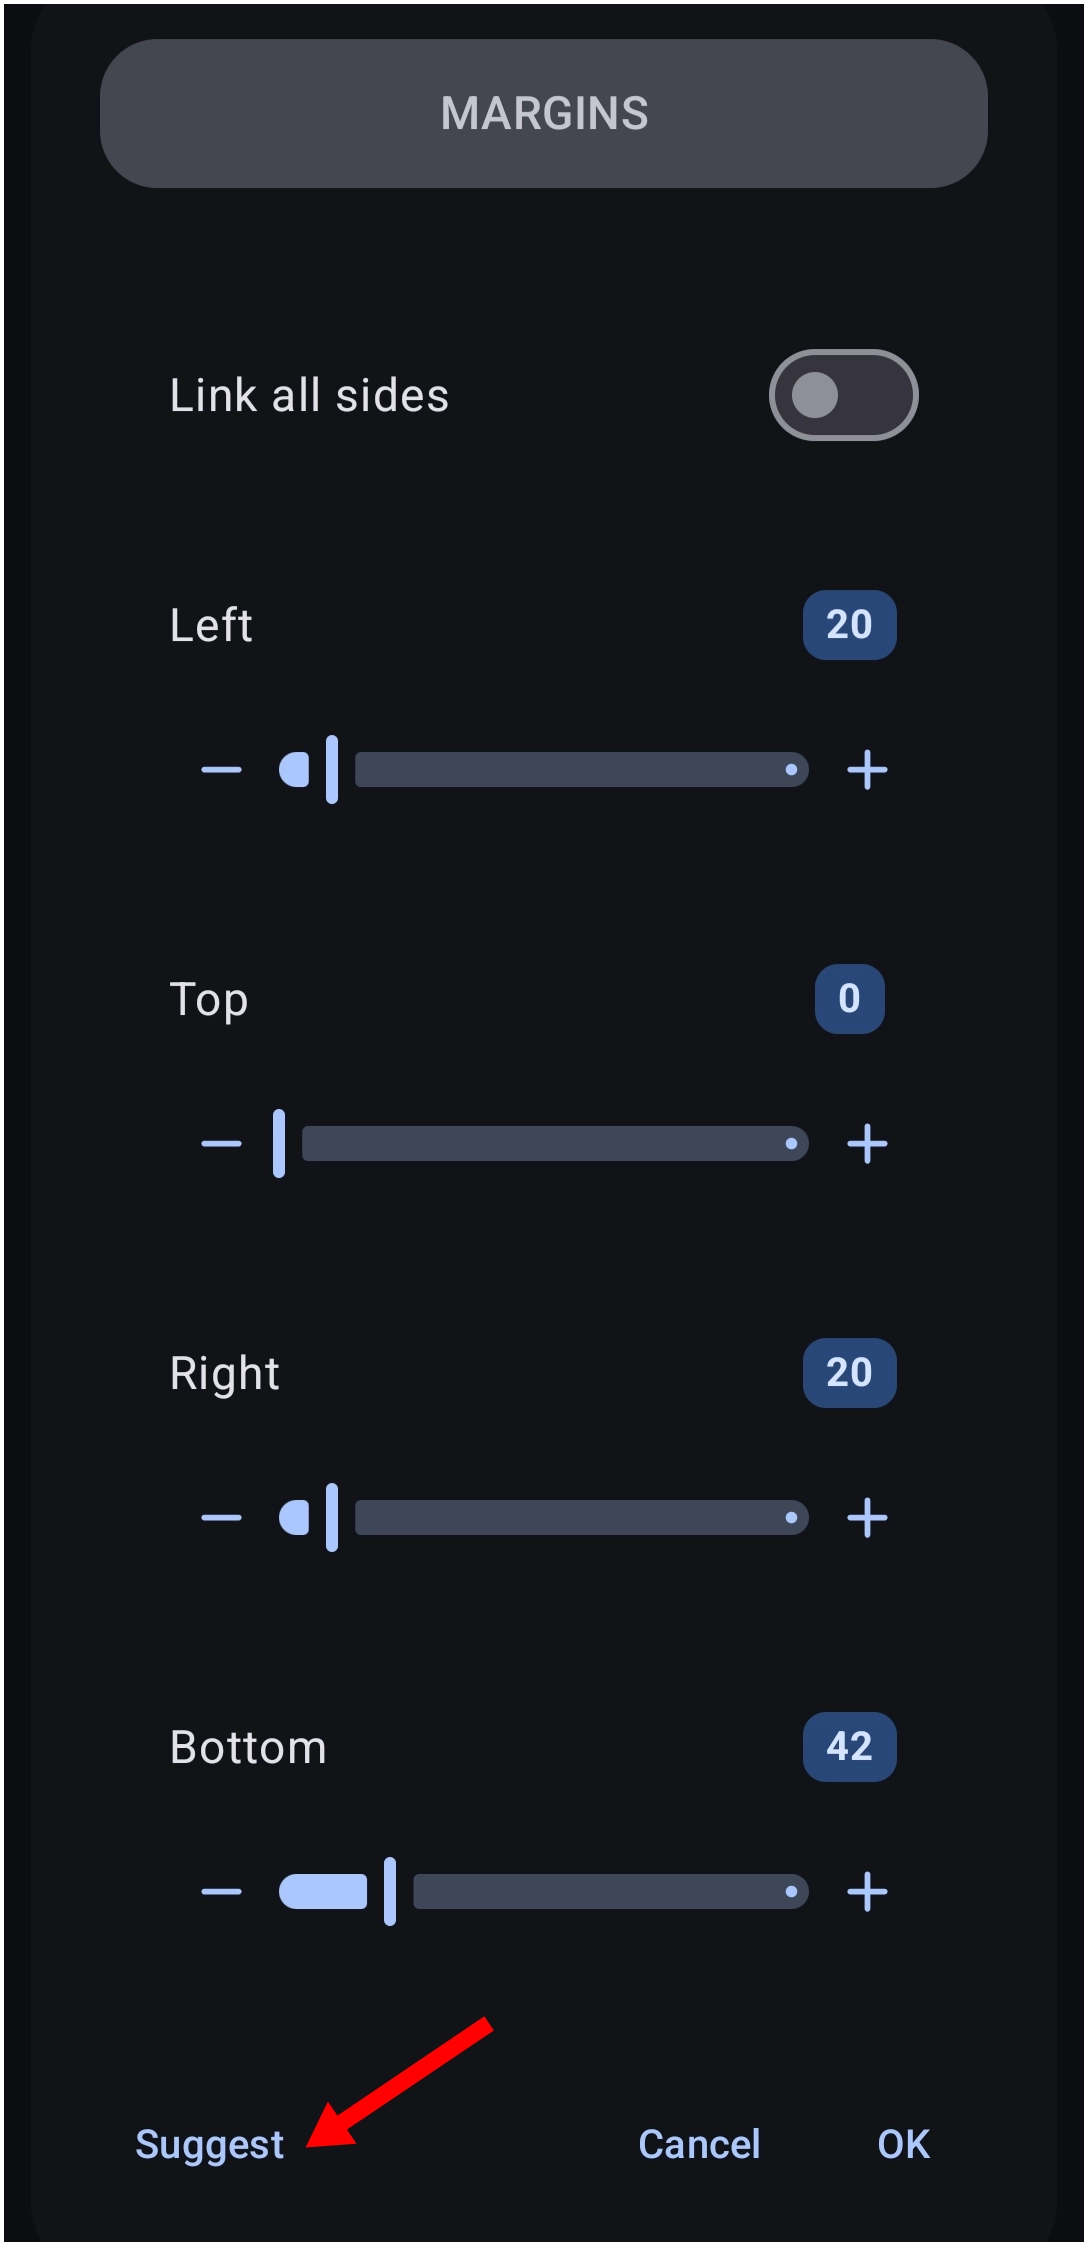
- The Shadow/Margin Rule manually requires a calculation of increasing the object's margins to be greater than or equal to the shadow's radius and offset. In this case, that is 20 + 22.
- But the Launcher does follow the premise:
- Tap Suggest to see all sides appropriately filled in.
- The dialog is as shown here , then tap OKTap OK to exit.
- The shadow has been added to the base as its background
- The Frame with Shadow has been created.
- Clipping Mask
- Overlay a second Shape, in this case a photograph.
- Create the Photo Layer: Long-press the screen again and add a second shape: Add > Graphic > Default > Shape.
- Tap Add (+)
- Select Type and input
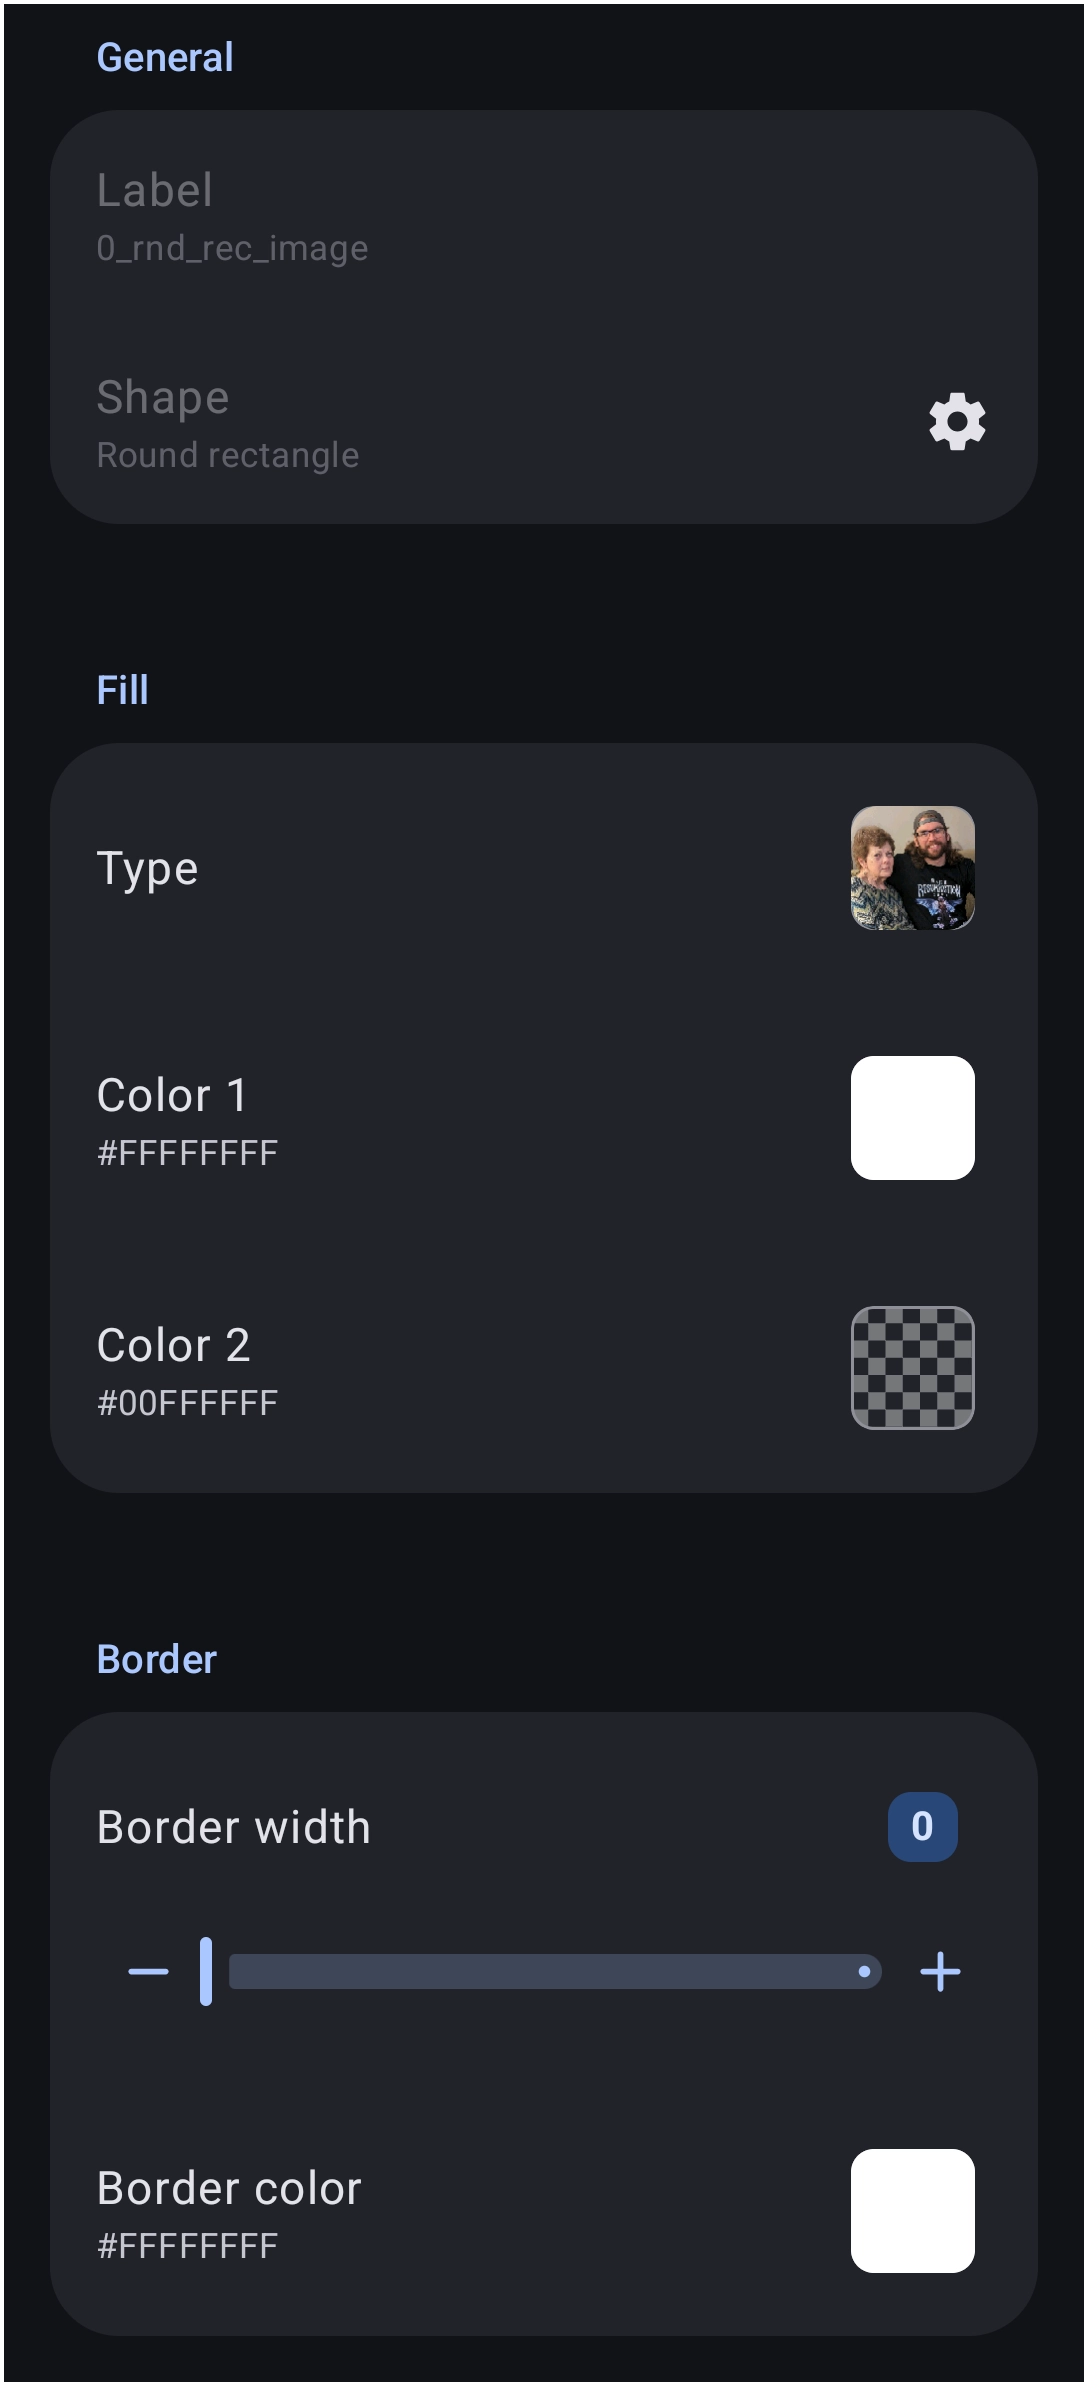
round_rectangle - Change label to
0_rnd_rec_image - In Options (gear), retain the default
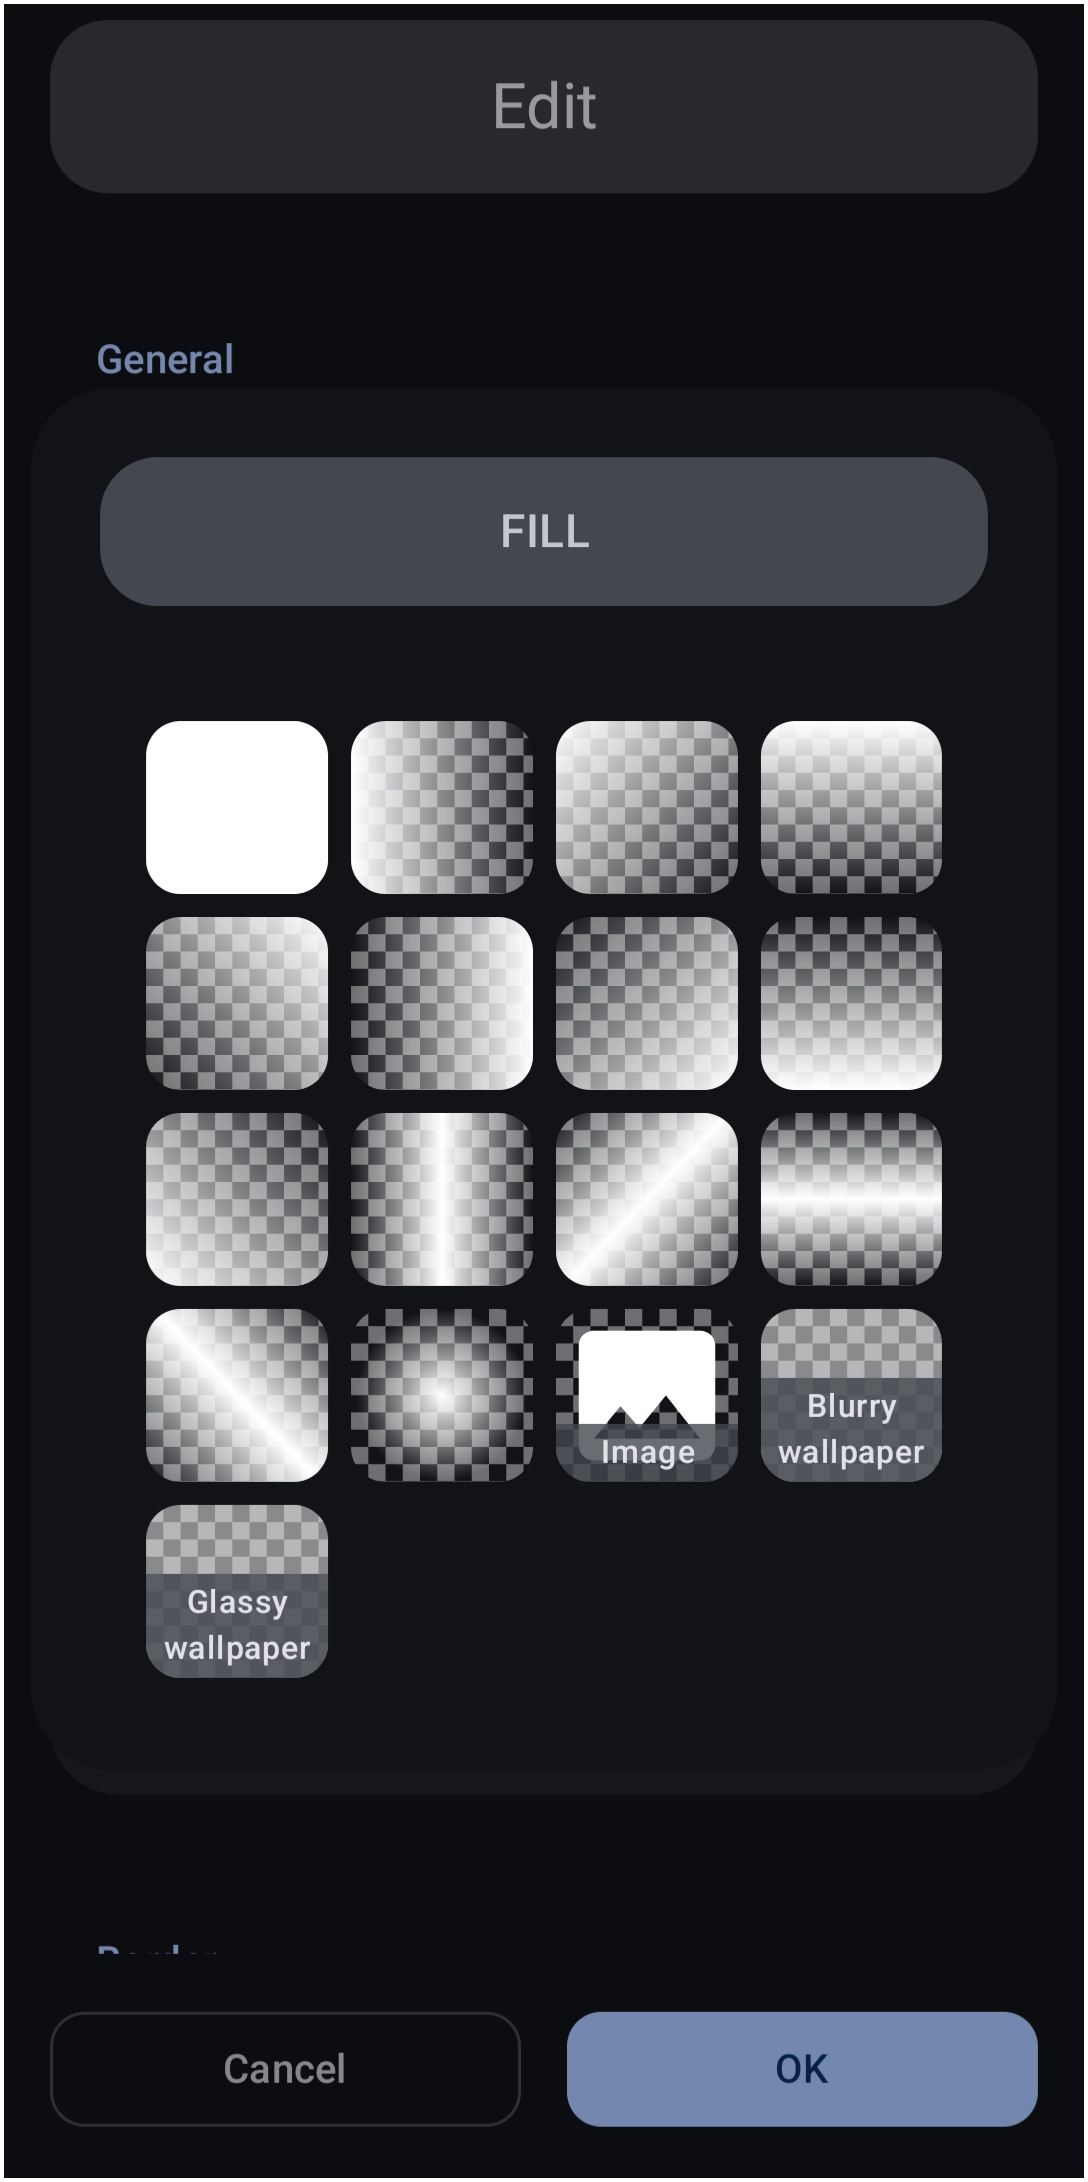
28as that is a Material You standard - In Fill Type, select Image to open the Image Resource dialog.
- Select the desired image
- Tap OK. The two dialogs in this section can be viewed here. The masked image has been placed in the Shape Resources.
- Layer the Masked Image over the Frame
- Add the Image Shape to the page. In the Page Design menu, tap Add > Graphic > Default > Shape >
0_rnd_rec_image - The Launcher places the Masked Image in the center of the page.
- If the Frame/Shadow is still in that location, the Masked Image is placed directly on top (Z-order).
- If not, move the 2 objects to the desired location with the Masked Image set directly on top.
- The default shape (object size) is
431. In order to view the Frame/Shadow, the size of the Masked Image must be reduced in size.
- Select the Masked Image to reveal the Edit icon (pencil) and tap it.
- Activate the Keep aspect ratio and tap the Width dialog to enter
334(this can be changed if desired) - Tap OK
- The Masked Image will approximate the center of the Frame/Shadow but may require adjustment. Either use Precision or Visual Adjustment :
- Precision
- Select the Base Shape and tap the Position & size icon (the intersecting arrows). Note the exact Center X and Center Y values.
- Select the Masked Image, open its Position & size menu, and manually type in those exact same Center X and Center Y values.
- Visual Adjustment
- With the Masked Image selected, select the move icon (joystick) to precisely locate the image
- Scaling the Frame/Shadow/Masked Image
- If the final result needs to be resized, scale it:
- Group the objects
- In the Page Design menu, tap the Selection icon
- Tap/drag from right to left to cover at least part of both objects. This will group both objects.
- In the Object Design menu (bottom), tap the Group icon.
- In that same menu (bottom), now tap the Rotate/Transform icon, then activate Transform
- The top slider (default of 100) is the Scale action
Comments & Feedback
Toby Lancer is ready to help! Look for the Quick Help form:
► Desktop: left sidebar located near the bottom for Private to Admin
► Mobile: 3-bar menu at page top.
► Use the Discussion section below to share any experiences and communications with other Total Launcher users.
► Any Registered User can directly update this and any wiki page if desired.
Moderation: To keep the manual clean, all comments are held for appropriateness review. Preview any comment before submitting it. It will not be displayed after submission until it is reviewed. So, please, do not resubmit.
Formatting: If using any code snippets, place them inside code tags (e.g., 'code') using double single quotes (') before and after to keep them readable.
Be Kind: This is a community effort. Please keep feedback constructive and on topic.
~~DISCUSSION~~